Объявление Версия Armored Core 6 для PS4 Pro на PS5, кажется, работает с блокированными 60 кадрами в секунду – GameTopic.

Версия Armored Core 6 для PS5 работает очень хорошо и в основном на 60 кадрах в секунду в режиме производительности, ...

История Сезонов Замечательная жизнь – Как увеличить навык кулинарии’ In this guide, we will explore tips and tricks on how to increase your cooking skill in the game Story of Seasons A Wonderful Life. Whether you’re a seasoned chef or a beginner in the kitchen, these strategies will help you become a top-notch cook in no time. 1. Start with the Basics Like in real life, mastering cooking starts with the basics. Begin by learning simple recipes and practicing them regularly. Don’t worry if your dishes don’t turn out perfect at first, as practice makes perfect. 2. Experiment with Ingredients Don’t be afraid to experiment with different ingredients. Mix and match flavors to create unique and delicious dishes. Who knows, you might discover a new recipe that will make you the talk of the town. 3. Attend Cooking Classes In the game, you have the opportunity to attend cooking classes. Take advantage of this and learn from the experts. Not only will you learn new recipes, but you’ll also gain valuable tips and tricks to enhance your cooking skills. 4. Upgrade Your Kitchen Invest in upgrading your kitchen equipment. Upgraded utensils and appliances can make a huge difference in the quality of your dishes. Plus, it’s always more enjoyable to cook in a stylish and efficient kitchen. 5. Share Your Culinary Creations Don’t keep your culinary creations to yourself. Share them with the residents of the town and receive feedback. Not only will this help you improve your cooking skills, but it will also earn you a reputation as a talented cook. 6. Participate in Cooking Competitions Put your cooking skills to the test by participating in cooking competitions. This is a great way to showcase your talent and win prizes. Plus, it’s always exciting to compete against other skilled chefs and see who comes out on top. 7. Don’t Forget to Have Fun Last but not least, don’t forget to have fun. Cooking is meant to be enjoyable, so don’t stress too much about perfection. Embrace the process, experiment, and most importantly, savor the delicious results of your hard work. By following these tips, you’ll soon become a master chef in Story of Seasons A Wonderful Life. So put on your apron, sharpen your knives, and get ready to create culinary masterpieces that will leave everyone in awe.

Если игроки повышают свой навык готовки в игре Story of Seasons A Wonderful Life, они могут приготовить лучшие блюда,...

Балдурское ворота 3 Как нанять Минска In this guide, we will show you how to recruit the legendary hero Minsc in Baldur’s Gate 3. Minsc, with his trusty hamster companion Boo, is a fan-favorite character known for his bravery and hilarious one-liners. So, let’s dive into the world of Baldur’s Gate and see how we can add this lovable hero to our party! Step 1 Find Minsc First things first, you need to locate Minsc in the game. You can find him in the early parts of the game, specifically in the Druid Grove area. Look for a man with a distinctive look, wearing a set of blue armor and carrying a huge sword. Trust me, you won’t miss him! Step 2 Start a Conversation Approach Minsc and start a conversation with him. He might be a bit grumpy at first, but don’t worry, he’s just a big softy deep down. Choose dialogue options that show your interest in his quest and his hamster companion Boo. Minsc will appreciate your genuine curiosity. Step 3 Complete Minsc’s Quest To recruit Minsc, you will need to help him with his personal quest. He is on a mission to rescue his beloved hamster, Boo, who has been kidnapped. Accept his quest and promise to aid him in his noble quest. Don’t worry, it’s not as difficult as it sounds! Step 4 Rescue Boo Follow Minsc to the location where Boo is being held captive. Be prepared for some enemies along the way, as Minsc’s enemies won’t let him go easily. Fight your way through and rescue the adorable hamster. Minsc will be eternally grateful to you. Step 5 Welcome Minsc to Your Party After rescuing Boo, Minsc will be overjoyed and offer to join your party. Accept his offer, and he will become a valuable asset in your adventures. With his exceptional combat skills and hilarious banter, Minsc will surely make your gaming experience even more enjoyable. And there you have it, a step-by-step guide on how to recruit Minsc in Baldur’s Gate 3. Now, go forth and conquer the world of Faerûn with your newfound companion and his trusty hamster sidekick! Enjoy your gaming journey, and remember to always keep a watchful eye on Boo!

Хотите нанять Минска в качестве спутника в Baldur's Gate 3? Мы вас поддержим!

Эксклюзивно Властелин Колец Возвращение в Морию получает дату релиза для PS5 и ПК – GameTopic

Властелин колец Возвращение в Морию выйдет на PlayStation 5 в цифровом формате и на ПК 24 октября, а физическое издан...

Фазмофобия Как использовать проектор DOTS’ In this guide, we will teach you how to use the DOTS projector in Phasmophobia. The DOTS projector is a handy tool that can help you identify and communicate with ghosts in the game. So, let’s get started and unravel the mysteries of the paranormal! Step 1 Acquiring the DOTS Projector To use the DOTS projector, you first need to purchase it from the in-game store. It’s a bit pricey, but trust me, it’s worth every penny. Once you have it in your inventory, you’re ready to go ghost hunting! Step 2 Setting up the DOTS Projector Now that you have the DOTS projector, it’s time to set it up. Find a suitable location in the haunted location where you suspect ghostly activity. Make sure it’s a place where the projector can cover a wide area. Remember, ghosts can be sneaky and move around, so choose wisely. Step 3 Turning on the DOTS Projector Once you’ve found the perfect spot, it’s time to turn on the DOTS projector. Simply interact with it and watch as it springs to life, projecting dots onto the walls. These dots are not just for decoration, my friend. They are a crucial tool in detecting ghostly presence. Step 4 Observing the DOTS Now that the DOTS projector is up and running, it’s time to observe the dots. Keep an eye out for any changes in the pattern or movement of the dots. If the dots start to move or form a specific shape, it’s a sign that a ghost is nearby. Get ready for some spooky encounters! Step 5 Communicating with the Ghost Once you’ve detected the presence of a ghost using the DOTS projector, it’s time to communicate with it. Grab your trusty spirit box or EMF reader and start asking questions. The ghost may respond through the DOTS projector by manipulating the dots. Pay attention to any changes and use them to gather information about the ghost’s identity or intentions. And there you have it! You are now equipped with the knowledge of how to use the DOTS projector in Phasmophobia. Remember, ghost hunting can be a thrilling and sometimes dangerous adventure, so proceed with caution. Happy ghost hunting!

Игроки, которые интересуются, как работает проектор DOTS в игре Phasmophobia, могут найти подробности о этом новом те...

Долина Мечты Диснея Как сделать сахарный картинг Ванеллопы In this game guide, we will show you how to make Vanellope’s iconic Sugar Kart in Disney Dreamlight Valley. Get ready to race in style with this sweet and speedy vehicle! Step 1 Gather the Ingredients To make Vanellope’s Sugar Kart, you will need the following ingredients – 2 cups of sugar – 1 cup of flour – 1/2 cup of butter – 1/4 cup of milk – 1 teaspoon of vanilla extract – A pinch of salt – Food coloring (optional) Step 2 Mix it Up Start by preheating your oven to 350 degrees Fahrenheit (175 degrees Celsius). In a large bowl, combine the sugar, flour, butter, milk, vanilla extract, and salt. Mix everything together until you have a smooth batter. If you want to add some color to your Sugar Kart, now is the time to add a few drops of food coloring. Step 3 Shape the Kart Once your batter is ready, it’s time to shape it into a kart. You can use a kart-shaped mold if you have one, or simply shape it by hand. Make sure to create a sleek and aerodynamic design, just like Vanellope’s Sugar Kart in the movie! Step 4 Bake and Decorate Place your kart-shaped batter on a baking sheet and pop it into the oven. Let it bake for about 15-20 minutes, or until it’s golden brown and cooked through. Once it’s done, take it out of the oven and let it cool completely. Now comes the fun part – decorating your Sugar Kart! Use icing, candies, and any other sweet decorations you like to bring your kart to life. Get creative and make it as colorful and vibrant as possible. Step 5 Ready to Race! Once your Sugar Kart is fully decorated and the icing has set, it’s time to take it for a spin! Find a smooth surface, set up a racecourse, and let the fun begin. Just be careful not to eat too much of your creation – it’s so delicious, it’s tempting to take a bite! So there you have it – the recipe for Vanellope’s Sugar Kart in Disney Dreamlight Valley. Get baking and enjoy the sweetest race of your life!

Вот все, что вам нужно знать, чтобы сделать сахарный картинг Ванеллопы в Долине Сказочного Света от Диснея.

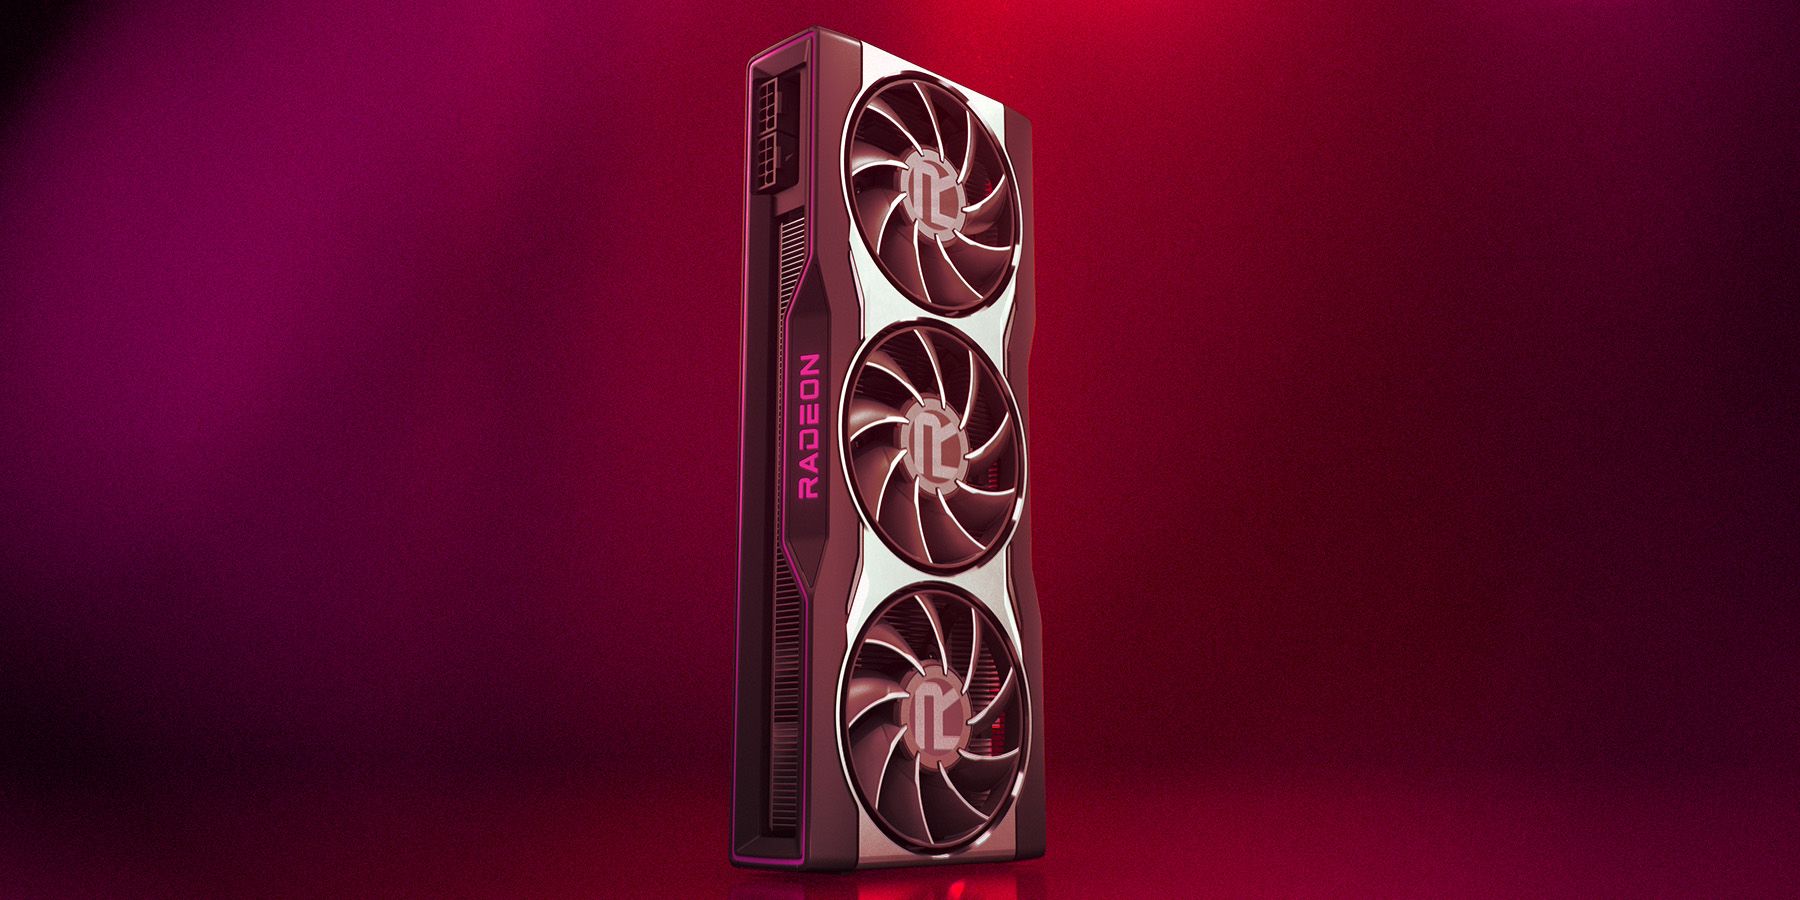
AMD Radeon RX 7800 XT, 7700 XT запускаются 25 августа на Gamescom

AMD продемонстрирует свои графические карты Radeon RX 7800 XT и 7700 XT на Gamescom 25 августа.

Как победить Смерть и выжить более 30 минут в Vampire Survivors Now, let me give you some tips on how to defeat Death and survive over 30 minutes in the thrilling game Vampire Survivors. Trust me, I’ve been there, done that, and even got the virtual t-shirt to prove it. 1. Stock up on garlic Vampires hate the stuff, so make sure to have plenty of it in your inventory. It’s your first line of defense against these blood-sucking fiends. Plus, it adds a nice touch of flavor to your virtual meals. 2. Master the art of stealth Sneaking around is your best friend when you’re trying to survive in a world full of vampires. Stay in the shadows, move silently, and avoid making any unnecessary noise. Remember, vampires have excellent hearing, so even the sound of your virtual footsteps can give you away. 3. Upgrade your weapons A wooden stake might be the classic vampire-slaying weapon, but in Vampire Survivors, you’ll need more than that. Invest in some high-powered firearms and upgrade them whenever possible. Trust me, shooting a vampire in the face with a bazooka is a very satisfying experience. 4. Form alliances It’s dangerous to go alone, so team up with other survivors. Strength in numbers, right? Just make sure you can trust them, because in a post-apocalyptic world filled with vampires, betrayal is always just around the corner. 5. Don’t forget to level up As you progress through the game, make sure to level up your character. This will give you access to new abilities, skills, and perks that can make all the difference in your fight against the undead. Plus, who doesn’t love the feeling of becoming a badass vampire slayer? 6. Stay hydrated I know, I know, it’s a game about vampires, not a survival game in the desert. But trust me, staying hydrated is important. It keeps your virtual stamina up and your reflexes sharp. Plus, it’s a good excuse to have a virtual beer or two while you’re at it. So there you have it, my fellow vampire slayers. Follow these tips, and you’ll be well on your way to defeating Death and surviving over 30 minutes in Vampire Survivors. Good luck, and may the garlic be with you!

Вот как выжить 31 минуту в Роскошной Библиотеке

Starfield Как предварительно загрузить игру In the world of gaming, there are few things more exciting than the release of a highly anticipated game. And when it comes to highly anticipated games, Starfield is at the top of the list. Developed by Bethesda Game Studios, the creators of the critically acclaimed Elder Scrolls and Fallout series, Starfield is a game that promises to take players on an epic space-faring adventure. With the release date of Starfield fast approaching, many gamers are eager to get their hands on the game as soon as possible. One way to ensure that you’re ready to go the moment the game launches is by preloading it. Preloading allows you to download the game files ahead of time, so that when the release date arrives, all you have to do is hit play and start exploring the vast reaches of space. But how exactly do you preload Starfield? Fear not, fellow gamers, for I am here to guide you through the process. Step 1 Check Your Platform Before you can preload Starfield, you need to make sure that your platform supports this feature. Typically, preloading is available on PC, Xbox, and PlayStation platforms. Check the official website or your platform’s store to confirm if preloading is an option. Step 2 Purchase the Game Once you’ve confirmed that preloading is available on your platform, the next step is to purchase the game. This can be done through your platform’s store or through a retailer. Make sure to choose the edition that best suits your gaming needs. Step 3 Download the Game Now that you’ve purchased the game, it’s time to start the download. Depending on your internet connection and the size of the game, this process may take some time. So sit back, relax, and let the download do its thing. Step 4 Get Excited While the game is downloading, take a moment to let the excitement build. Read up on the latest news and updates about Starfield, watch some gameplay trailers, and start mentally preparing yourself for the adventure that awaits. Step 5 Prepare for Launch Once the game is fully downloaded and installed, all that’s left to do is wait for the release date. Double-check that your platform is set to automatically update the game, so that you’ll be ready to play as soon as it becomes available. And there you have it, my fellow gamers. A simple and straightforward guide to preloading Starfield. Now all that’s left to do is count down the days until launch and get ready to embark on an interstellar adventure like no other. Happy gaming!

В то время как игрокам на Steam придется немного подождать, владельцы Xbox уже могут начинать предварительную загрузк...

Создатель мода AI-Powered GTA 5 Story Mode, вероятно, не будет сопротивляться Take-Two после его закрытия – GameTopic

Создатель яркого мода для Grand Theft Auto 5, который обещал живую, с искусственным интеллектом сюжетную линию, призн...

Покемон Хоум Как перенести покемонов в игры Pokemon Brilliant Diamond & Shining Pearl In this guide, we will show you how to transfer your beloved Pokemon from Pokemon Home to the exciting new remakes, Pokemon Brilliant Diamond and Shining Pearl. So grab your Pokeballs and get ready to embark on a nostalgic journey! Step 1 Prepare Your Pokemon Home Account Before we can transfer our Pokemon, make sure you have a Pokemon Home account. If you don’t have one yet, don’t worry! You can easily download the app from the Nintendo eShop and set up your account. Once you have your account ready, proceed to the next step. Step 2 Start Pokemon Home Launch the Pokemon Home app on your Nintendo Switch or mobile device. Make sure you are connected to the internet and log in to your Pokemon Home account. Step 3 Connect Pokemon Home with Pokemon Brilliant Diamond & Shining Pearl To transfer your Pokemon, you need to establish a connection between Pokemon Home and Pokemon Brilliant Diamond or Shining Pearl. On the main menu of Pokemon Home, select the Nintendo Switch icon. Step 4 Link Your Game In Pokemon Home, select the Pokemon icon at the bottom of the screen. This will take you to the Pokemon management screen. From here, select the game you want to link, which in this case is either Pokemon Brilliant Diamond or Shining Pearl. Step 5 Choose Your Pokemon Now it’s time to choose the Pokemon you want to transfer. You can select individual Pokemon or transfer entire boxes. Once you’ve made your selection, confirm your choices and proceed to the next step. Step 6 Transfer Your Pokemon Sit back and relax as Pokemon Home transfers your selected Pokemon to Pokemon Brilliant Diamond or Shining Pearl. The transfer process may take some time, so be patient and resist the urge to play with your Pokemon while they’re on their way. Step 7 Collect Your Pokemon in Pokemon Brilliant Diamond & Shining Pearl Once the transfer is complete, launch Pokemon Brilliant Diamond or Shining Pearl. In the game, head to a Pokemon Center and speak to the NPC in the middle of the room. They will help you collect your transferred Pokemon and add them to your party or storage. Congratulations! You have successfully transferred your Pokemon from Pokemon Home to Pokemon Brilliant Diamond or Shining Pearl. Now you can continue your adventure with your favorite Pokemon by your side. Good luck and have a great time exploring the Sinnoh region!

Вот как тренеры могут переносить покемонов из Pokemon Home в Brilliant Diamond & Shining Pearl и наоборот.

The Sims 4 Как изменить отношения In this guide, we will delve into the intricate world of relationships in The Sims 4 and discover the secrets to editing and modifying them to our heart’s content. Because let’s face it, in the virtual world, we have the power to shape relationships like a sculptor molds clay. Step 1 Get to Know Your Sims Before we can start meddling with relationships, we need to become familiar with our Sims. Who are they? What do they like? What makes their hearts flutter? Spend some time getting to know their personalities, interests, and aspirations. This will help you understand how their relationships work and how to play cupid later on. Step 2 Open the Relationship Panel Now that we have a good grasp of our Sims’ lives, it’s time to open the relationship panel. This handy tool will allow us to see all the connections our Sims have and make changes accordingly. To open it, simply click on the three dots in the lower right corner of the screen and select Relationships. Step 3 Analyze and Modify Once the relationship panel is open, you’ll be greeted with a web of interconnected Sims. Take a moment to analyze this web and identify the relationships you want to edit. Maybe you want to make two Sims best friends forever, or perhaps you want to create some romantic tension between them. The choice is yours! To modify a relationship, simply click on the interaction line connecting two Sims. This will open a menu with various options to choose from. You can increase or decrease the relationship status, change the relationship type, or even add special traits like Soulmates or Nemesis. Get creative and experiment with different combinations to see what works best for your story. Step 4 Monitor and Maintain Relationships in The Sims 4 are a fickle thing. They can change with a single interaction or a profound life event. It’s essential to monitor your Sims’ relationships regularly and make adjustments as necessary. Keep an eye on their social interactions, observe their body language, and listen to their conversations. This will help you fine-tune their relationships and keep the drama flowing. Step 5 Have Fun! Remember, The Sims 4 is a game, and games are meant to be fun! Don’t be afraid to experiment, make mistakes, and create outrageous scenarios. After all, it’s your virtual world, and anything is possible. So go ahead, play matchmaker, break hearts, or orchestrate a grand love affair. The choice is yours, and the possibilities are endless! And there you have it, a guide to editing relationships in The Sims 4. Now go forth, my fellow Simmers, and let the love (or chaos) begin!

Редактирование и изменение отношений с соседями-симами является важным аспектом в игре The Sims 4. Вот руководство, к...

Чемпионаты мира по Pokemon GO Как получить и активировать коды In this guide, we will walk you through the process of obtaining and redeeming codes for the Pokemon GO World Championships. Whether you’re a seasoned trainer or new to the game, this guide will help you level up your skills and increase your chances of victory. So grab your Pokeballs, and let’s dive into the world of Pokemon GO championships! Step 1 Stay Tuned for Code Releases To get your hands on the coveted codes, you need to stay updated with the latest news and announcements. Follow official Pokemon GO social media accounts, subscribe to newsletters, and join online communities dedicated to the game. Codes can be released through various channels, so make sure you don’t miss any opportunity to catch them. Step 2 Participate in Events One of the best ways to obtain codes is by participating in Pokemon GO events. These events can be local or global, and they often offer exclusive rewards and access to special codes. Keep an eye on event announcements, and make sure to attend as many as possible. Not only will you have a chance to catch rare Pokemon, but you might also unlock some valuable codes along the way. Step 3 Trade with Fellow Trainers If you’re part of a Pokemon GO community, don’t hesitate to trade with fellow trainers. Sometimes, trainers stumble upon extra codes or have codes they don’t need. Trading can be a great way to get your hands on those codes and help out your fellow trainers in the process. Remember to be fair and respectful in your trades, and you might find yourself with a valuable code in no time. Step 4 Stay Persistent Codes for the Pokemon GO World Championships can be elusive, and it might take some time and effort to obtain them. Don’t get discouraged if you don’t succeed right away. Keep participating in events, engaging with the community, and staying updated with the latest news. Persistence is key, and your dedication will pay off in the end. Redeeming Codes Once you’ve obtained a code, it’s time to redeem it and unlock its rewards. Follow these steps to successfully redeem your Pokemon GO World Championships code Step 1 Open the Pokemon GO app on your mobile device. Step 2 Tap on the Pokeball icon at the bottom of the screen to open the main menu. Step 3 Select the Shop option. Step 4 Scroll down and tap on the Redeem button. Step 5 Enter your code in the designated field and tap Redeem. Step 6 Enjoy your rewards! Remember, codes often have expiration dates, so make sure to redeem them before they expire. Keep an eye out for new code releases and stay active in the Pokemon GO community to increase your chances of getting more codes in the future. Good luck, trainers, and may the Pokemon be with you in your journey to become the ultimate Pokemon GO champion!

Игроки Pokemon GO могут получить коды даже после окончания прямой трансляции, и вот как их получить и активировать дл...

Скайрим Как вернуть NPC к жизни In this guide, we will explore the mystical and sometimes hilarious world of resurrecting NPCs in Skyrim. Whether you accidentally killed your favorite quest giver or just want to mess around with the game’s mechanics, we’ve got you covered. So grab your necromancy 101 textbook and let’s dive into the undead shenanigans of Skyrim! Step 1 Gather Your Ingredients Resurrecting an NPC requires a few key ingredients. First, you’ll need a filled soul gem of sufficient strength. You can find these in various locations throughout Skyrim or purchase them from magic vendors. Second, you’ll need a copy of the spell Raise Dead. You can either find this spell in dungeons or purchase it from spell vendors. Lastly, you’ll need a sense of humor because things might get a little weird. Step 2 Locate the Corpse Now that you have everything you need, it’s time to locate the unfortunate NPC’s corpse. You can usually find it near the spot where they met their untimely demise. If you can’t remember where that is, don’t worry. Just follow the trail of broken furniture and scattered body parts. It’s hard to miss. Step 3 Prepare for Ritual Find a quiet spot away from prying eyes and prepare for the resurrection ritual. Equip the spell Raise Dead and make sure you have a clear line of sight to the corpse. Take a deep breath and get ready for some necromantic action. Step 4 Cast the Spell Aim directly at the corpse and cast the Raise Dead spell. If successful, you’ll witness the miraculous revival of the NPC. They might be a little disoriented at first, so give them a moment to collect themselves. It’s not every day that you come back from the dead, after all. Step 5 Enjoy the Chaos Once the NPC is back among the living, things might not go exactly as planned. They might start wandering aimlessly, get stuck in walls, or engage in bizarre conversations with other NPCs. Embrace the chaos and enjoy the unintended hilarity that follows. After all, what’s an adventure in Skyrim without a little bit of madness? Remember, resurrecting NPCs is not without consequences. Some may not take kindly to being brought back from the dead and might hold a grudge against you. Others might simply glitch out and become unresponsive. But that’s all part of the fun in Skyrim, isn’t it? So go forth, brave adventurer, and bring back those beloved NPCs from the clutches of death. May your journeys be filled with laughter, glitches, and epic tales to tell around the virtual campfire. Happy resurrecting!

В Skyrim есть несколько способов оживить мертвого NPC, но некоторые методы лучше других.

Лучшие игры, похожие на Grand Theft Auto 5 в Xbox Game Pass (август 2023)

«GTA 5 может и не быть в Xbox Game Pass, но эти доступные игры должны снять схожий зуд.»

Все улучшения и исправления версии Baldur’s Gate 3 для ПК будут включены в версию для PS5 – GameTopic

Larian сообщил владельцам PlayStation 5, что все исправления, которые они выпускают для PC-версии Baldur's Gate 3, бу...

Балдурскими воротами 3 Как получить кору и цветы Суссур-дерева In this game guide, we will teach you how to obtain the elusive Sussur Tree Bark and Sussur Bloom in Baldur’s Gate 3. These rare ingredients are essential for crafting powerful potions and enchantments, so pay close attention! Step 1 Exploring the Verdant Forest To find the Sussur Tree Bark and Sussur Bloom, you’ll need to venture into the Verdant Forest. This lush and mystical area is home to the Sussur trees, which possess these precious resources. Be prepared for battles with dangerous creatures and puzzles along the way. Step 2 Identifying Sussur Trees Once you’re in the Verdant Forest, keep an eye out for Sussur trees. They have distinctive blue leaves and emit a soft hum, making them easy to spot. Approach the trees cautiously, as they may be guarded by hostile creatures. Step 3 Obtaining Sussur Tree Bark To collect the Sussur Tree Bark, you’ll need a sharp-edged tool. A dagger or a sturdy knife will do the trick. Carefully slice off a small piece of the bark without damaging the tree. Be quick and precise, as the trees can regenerate their bark over time. Step 4 Harvesting Sussur Bloom To acquire the Sussur Bloom, you must wait for the Sussur trees to bloom. This usually occurs during the night, so make sure to rest and set up camp nearby. Once the trees are in full bloom, gently pluck the vibrant flowers without disturbing the tree. Handle them with care, as they are delicate and can wither easily. Step 5 Utilizing Sussur Tree Bark and Sussur Bloom Now that you have the Sussur Tree Bark and Sussur Bloom, the possibilities are endless! Use them wisely in your potion brewing and enchantment crafting endeavors. These rare ingredients have potent magical properties and can greatly enhance your abilities. Remember, the Verdant Forest is a dangerous place, so come prepared with weapons, spells, and healing items. Good luck on your quest to obtain the coveted Sussur Tree Bark and Sussur Bloom in Baldur’s Gate 3!

Если вы ищете кору Суссура и цветок Суссура в игре Baldur's Gate 3, вот что вам нужно знать.

SCRY Artic – новая система охлаждения Plug-and-Play, разработанная для предотвращения перегрева вашей PS5 – GameTopic

SCRY Artic - новый аксессуар для охлаждения, разработанный для поддержания прохлады вашей PS5. В настоящее время он ф...

Бета-версия PS5 добавляет облачный стриминг игр – GameTopic

«Компания Sony недавно выпустила новое публичное бета-программное обеспечение для PlayStation 5, позволяющее выбранны...